valid HTML

valid CSS
 
ASEM-51
 
Application Note 0003 Rev. A March 17, 2013

The following article has been written by an unknown master, probably an enthusiastic ASEM-51 user. He has illustrated it with screenshots and originally posted it on computingfreak.com on April 3, 2007. It was useful, detailed, comprehensive, and easy to find with search-engines.
In May 2009 I found that this site had completely changed, but the collected articles had been moved to blogspot.de. However, the author's real name could no longer be retrieved, and (even more annoying) the screenshots were lost in space.
Recently I remembered that I had saved them somewhere, years ago. So I was able to restore the whole article, update, polish, and finally republish it on my own website, supposing the author's agreement. If he should ever read this, I'm looking forward to his mail.


ASEM-51 step-by-step Installation on Windows XP

Last time I wrote an installation for ASEM-51, a two-pass macro assembler for the Intel MCS-51 family of microcontrollers, using the batch file INSTALL.BAT. For someone who does not like anything that is running automatically, or things are not quite clear, here is a step-by-step installation guide for ASEM-51.

The files we require are

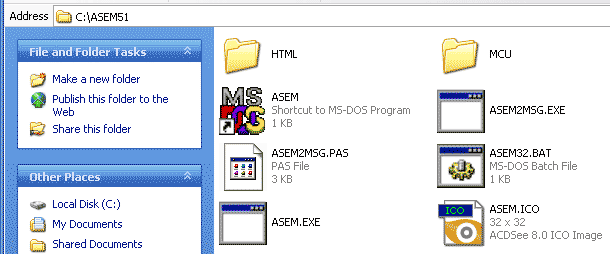
1. Create a new directory on your harddisk, e.g.  C:\ASEM51  and unpack
    all files of the ASEM-51 package into this directory (see Figure 1).

unpack ASEM-51

Figure 1.

2. Unpack MCUFILES.ZIP into a directory (see Figure 2).
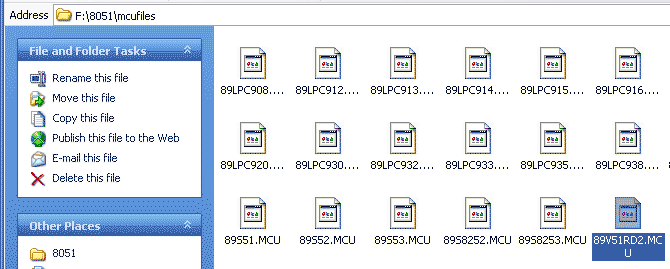
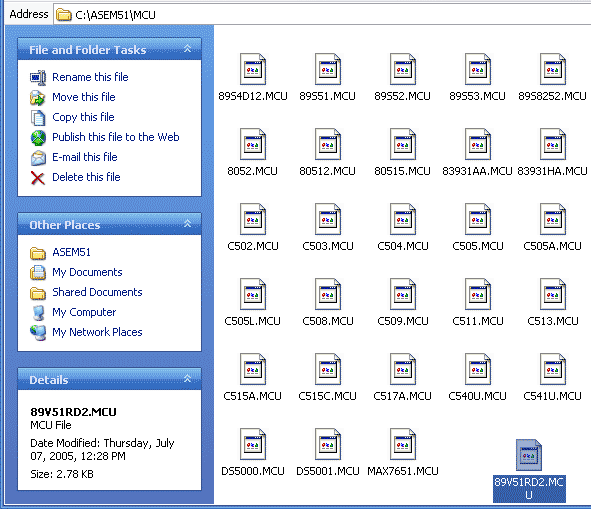
    Move the *.MCU you want to  C:\ASEM51\MCU  (see Figure 3).
    Here I move the P89V51RD2.MCU only.

MCU files
 

Figure 2.

move MCU files

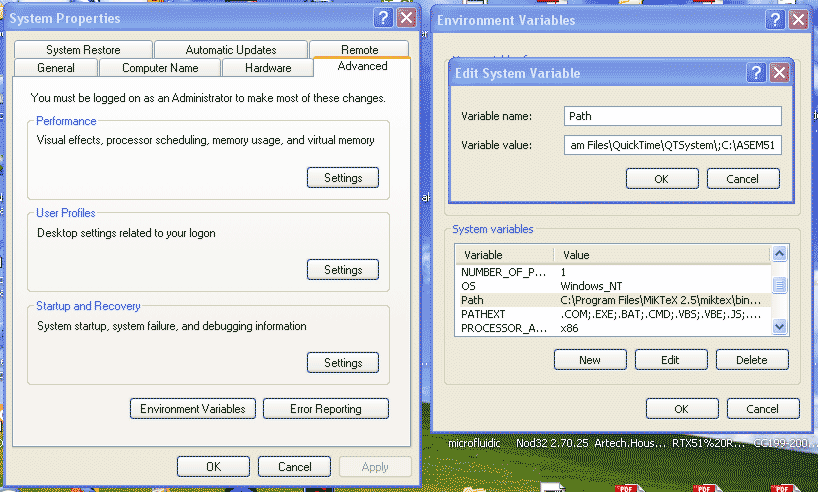
Figure 3.

3. Edit System Variable: Start-->right click on My Computer-->Properties.
    On System Properties click Advanced Tab, then click Environment Variables.
    On System variables select Path, then click Edit and append  ;C:\ASEM51
    in Variable value (see Figure 4).

edit System Variables
 

Figure 4.

4. Define ASEM51INC environment variable:
    On System variables (in Figure 4) click New,
    fill Variable name with  ASEM51INC
    and Variable value with  C:\ASEM51\MCU

5. Click OK and close all windows.

6. You can test by typing  ASEMW  in Command Shell (Start-->Run-->cmd).
    You should get something like this (see Figure 5):

Test ASEM-51

Figure 5.

Be sure to use the Win32 binaries ASEMW.EXE and HEXBINW.EXE under Windows XP (and later). They benefit of the Windows memory management and can handle long file names. The 16-bit real-mode programs for MS-DOS (ASEM.EXE and HEXBIN.EXE) are no longer running on 64-bit Windows systems anyway.


Last revised:   W.W. Heinz,   January 28, 2023